Std Cost Lookup
Note
Please note that the Std Cost Lookup functionality is included in versions 2019.1.0.0 and newer.
The Std Cost Lookup allows users to view all of the available Items in the system. When an Item is opened, users can then view the cost details such as the Cost Summary, Inventory Value, and History of the Item. From the Std Cost detail screen, users may also open the Routing or apply a cost change if necessary.
To view the Std Cost Lookup screen, navigate to the  tab and click on the
 ![]() icon. The Std Cost Lookup screen will
be displayed.
icon. The Std Cost Lookup screen will
be displayed.
Users are able to view Manufactured Items and Purchased Items by selecting the appropriate tab.
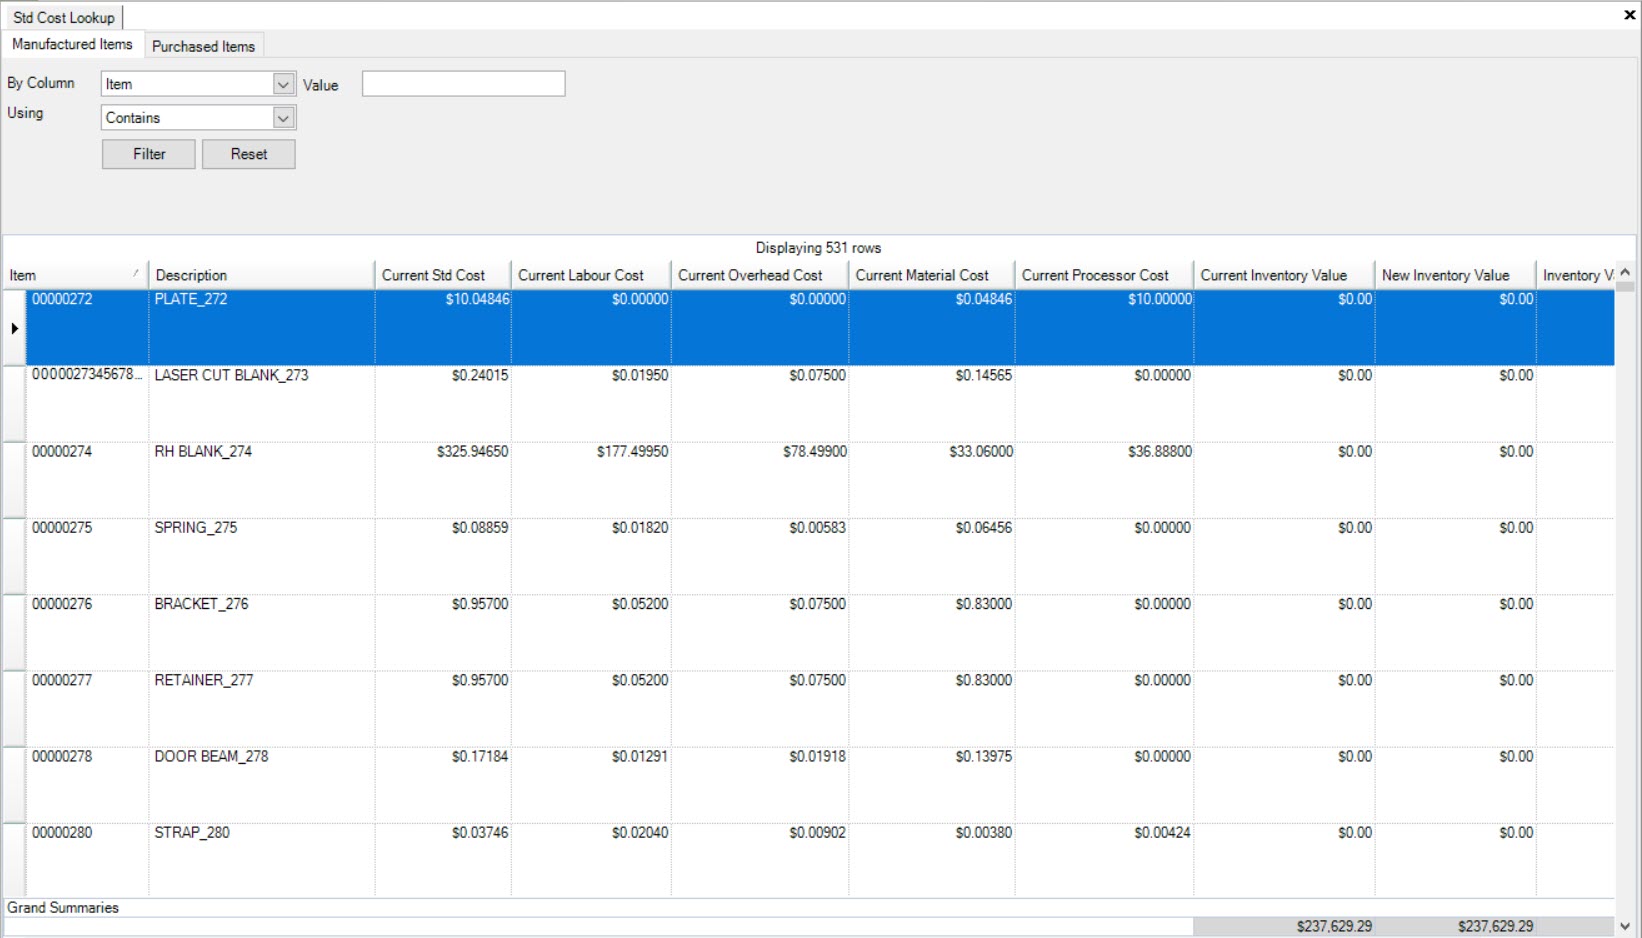
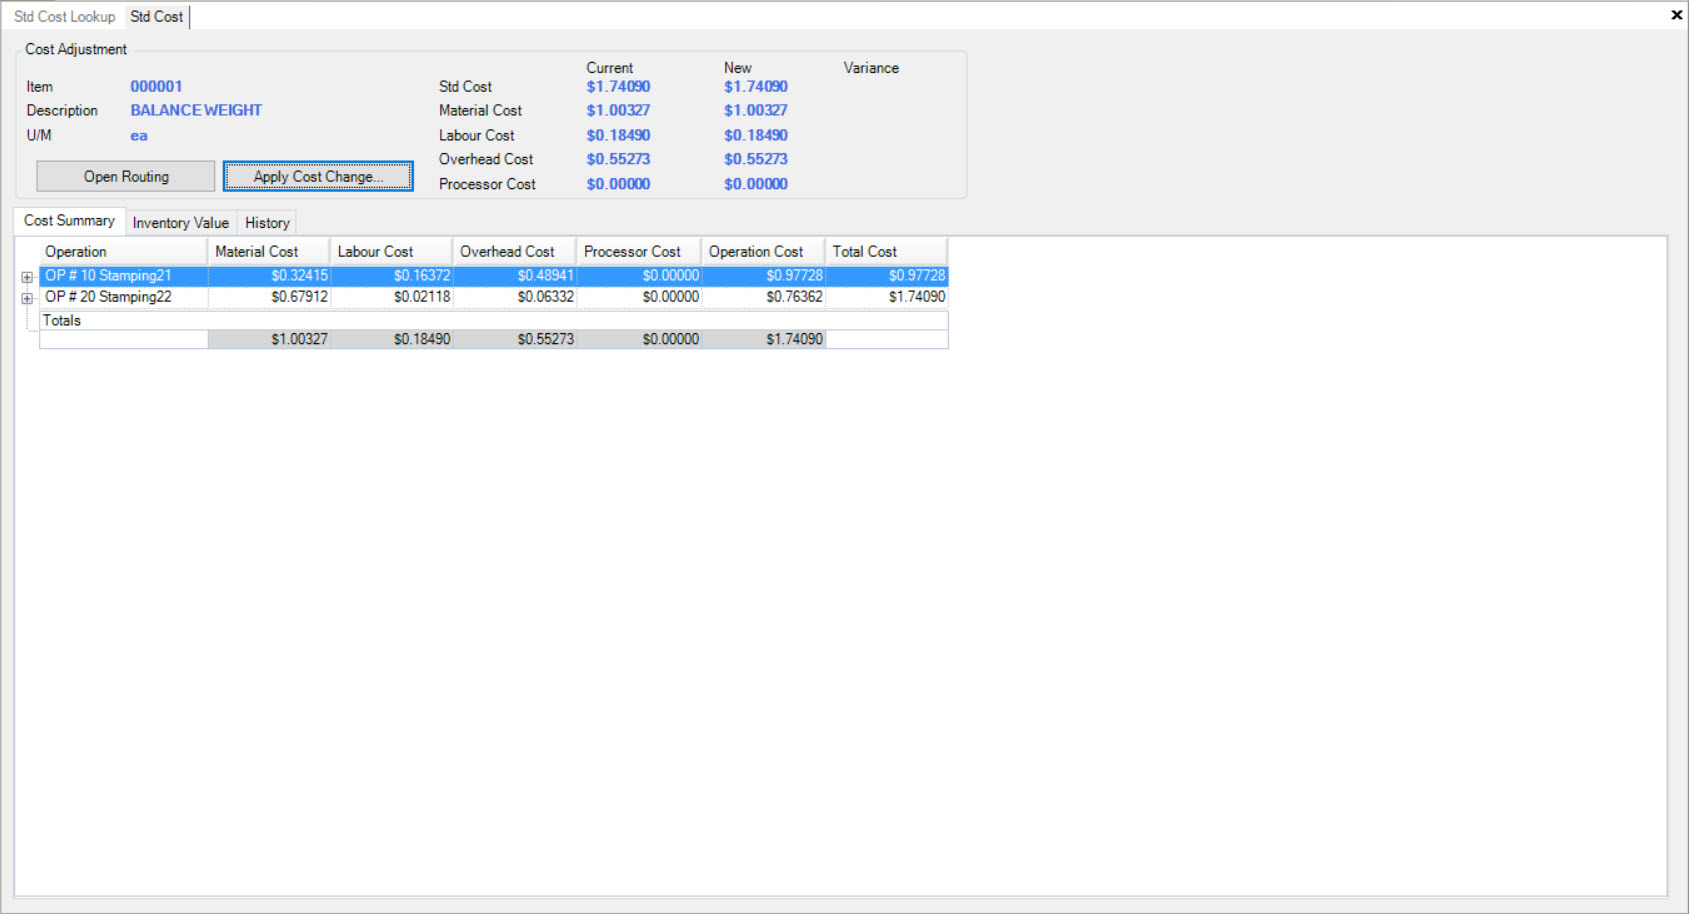
To view the cost details of a Manufactured Item, double-click on the appropriate row. The Std Cost detail screen will be displayed.
Note
Users can also right-click on the appropriate row and click on the Go To Std Cost... option.
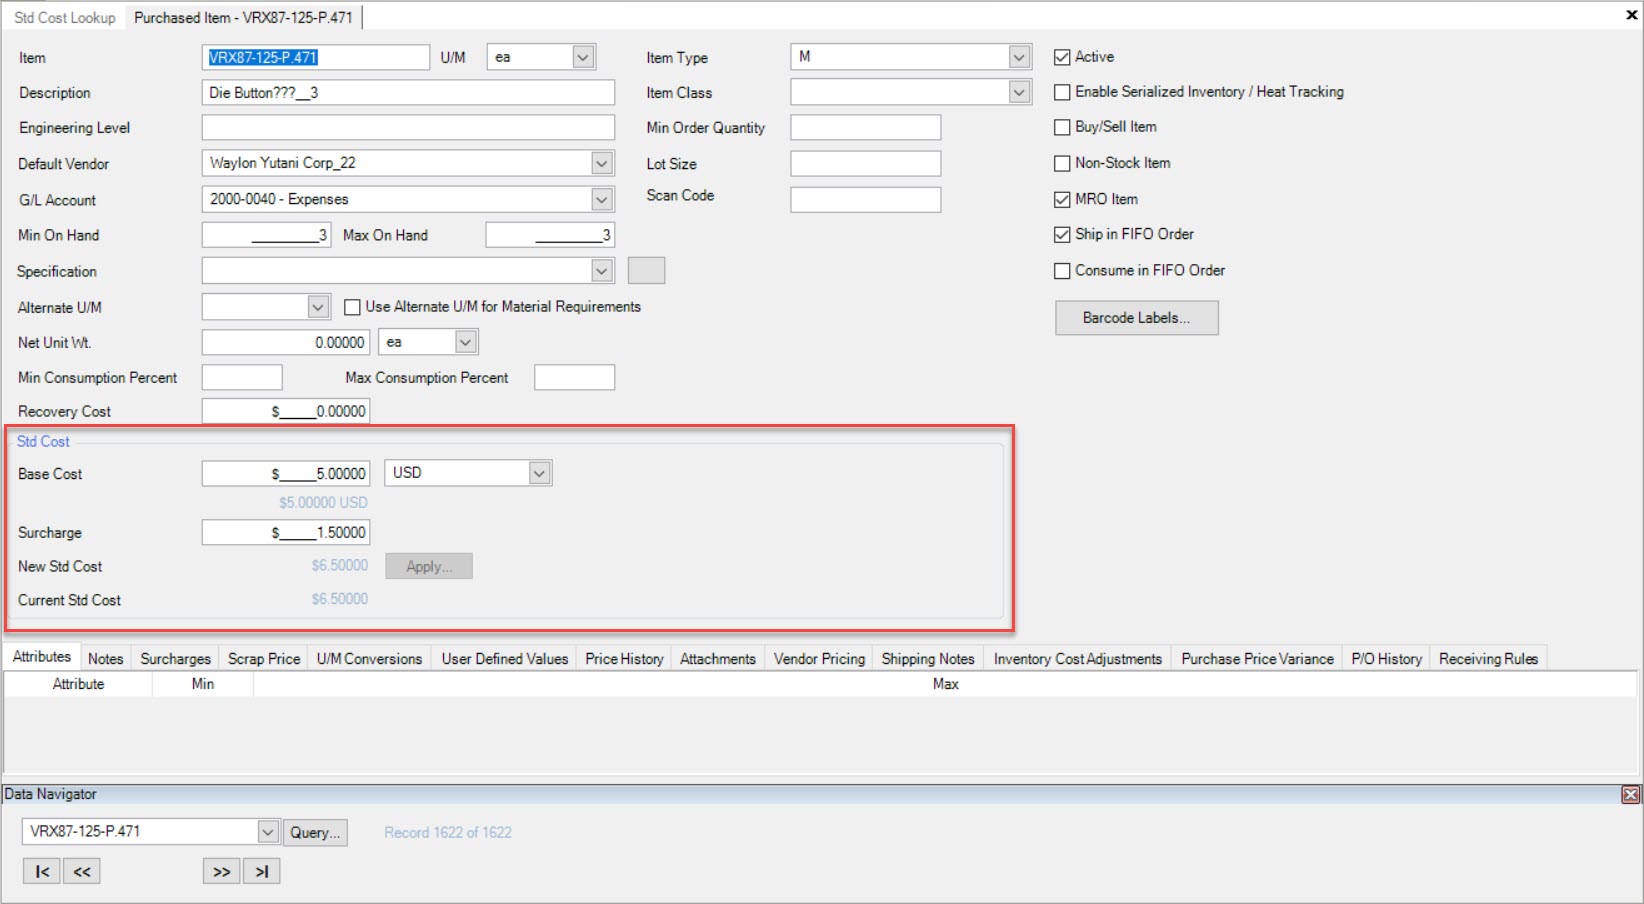
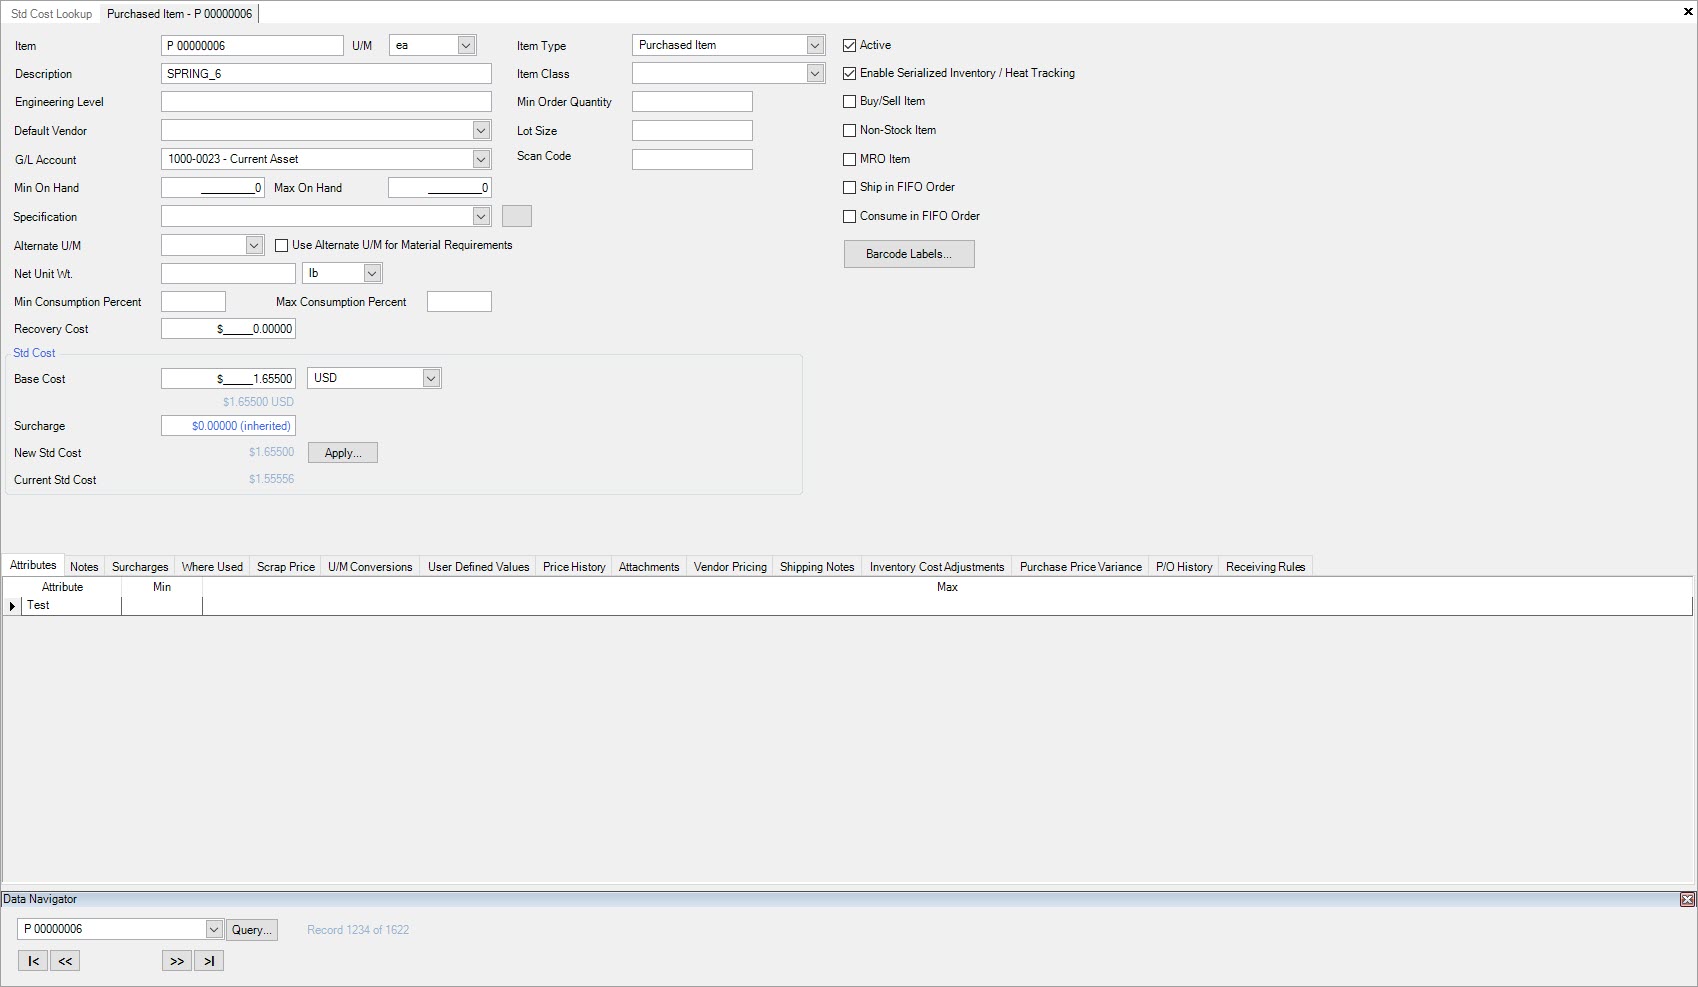
To view the cost details of a Purchased Item, make sure to select the Purchased Items tab. Then, locate and double-click on the appropriate row. The Purchased Item detail screen will appear displaying the Std Cost information in the header.
Std Cost Manufactured Items
To view Manufactured Items in the Std Cost Lookup, navigate to the  tab and click on the
 ![]() icon. The Std Cost Lookup screen will be displayed.
icon. The Std Cost Lookup screen will be displayed.

Make sure to select the  tab located near the top of the screen.
All of the Manufactured Items in the system will appear whether they have a cost change or not.
Cost Summary
To view the Cost Summary of a Manufactured Item, navigate to the  tab and click on the
 ![]() icon. The Std Cost Lookup screen will
be displayed.
icon. The Std Cost Lookup screen will
be displayed.

Make sure to select the  tab located near the top of the screen.
Locate and double-click on the appropriate Manufactured Item. On the Std Cost detail screen, make sure to select the  tab.
tab.
Note
Users can also right-click on the appropriate row and select the Go To Std Cost... option which will bring users to the Std Cost detail screen.
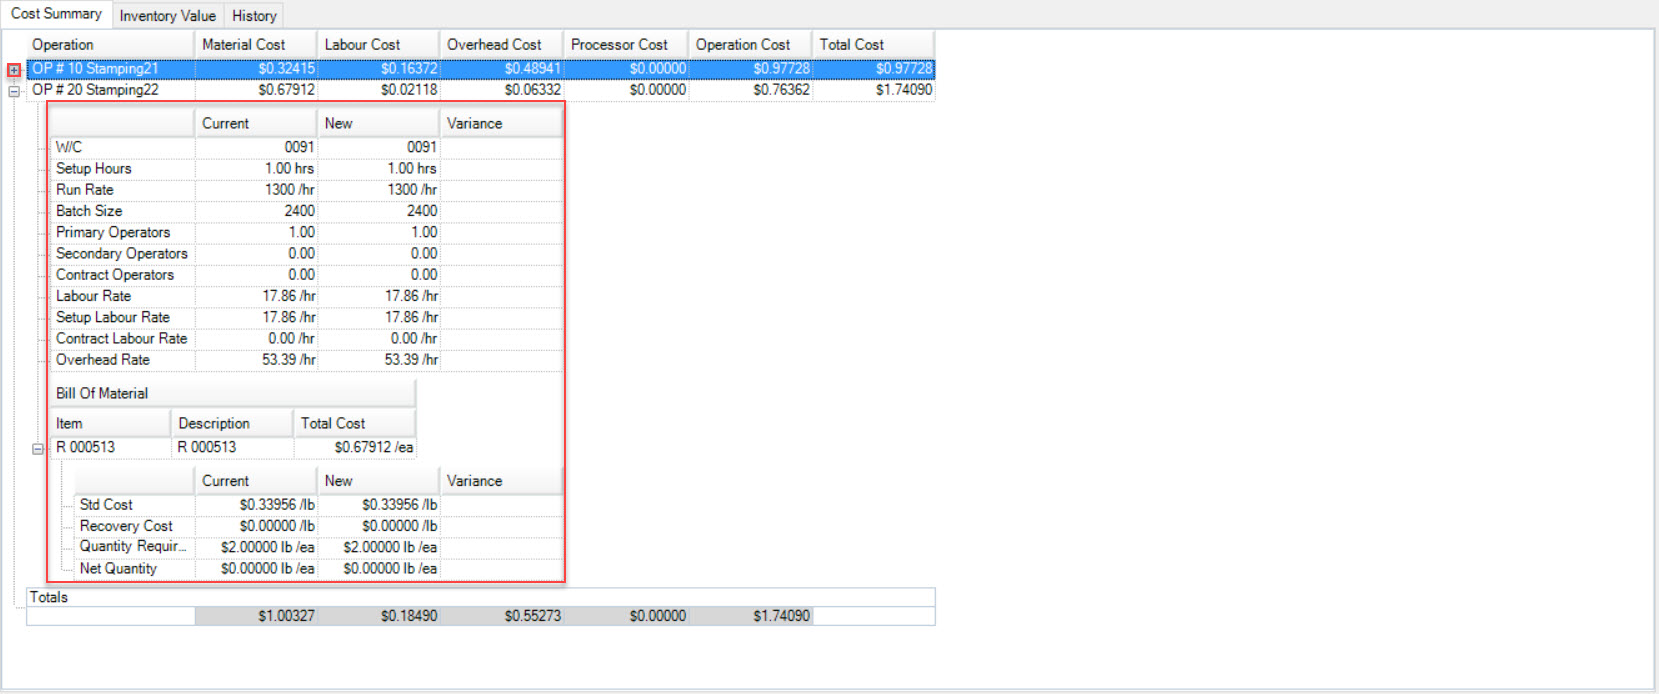
Now users will be able to view the Material Cost, Labour Cost, Overhead Cost, Processor Cost, Operation Cost, and the Total Cost for each Operation for a particular Manufactured Item in the system.
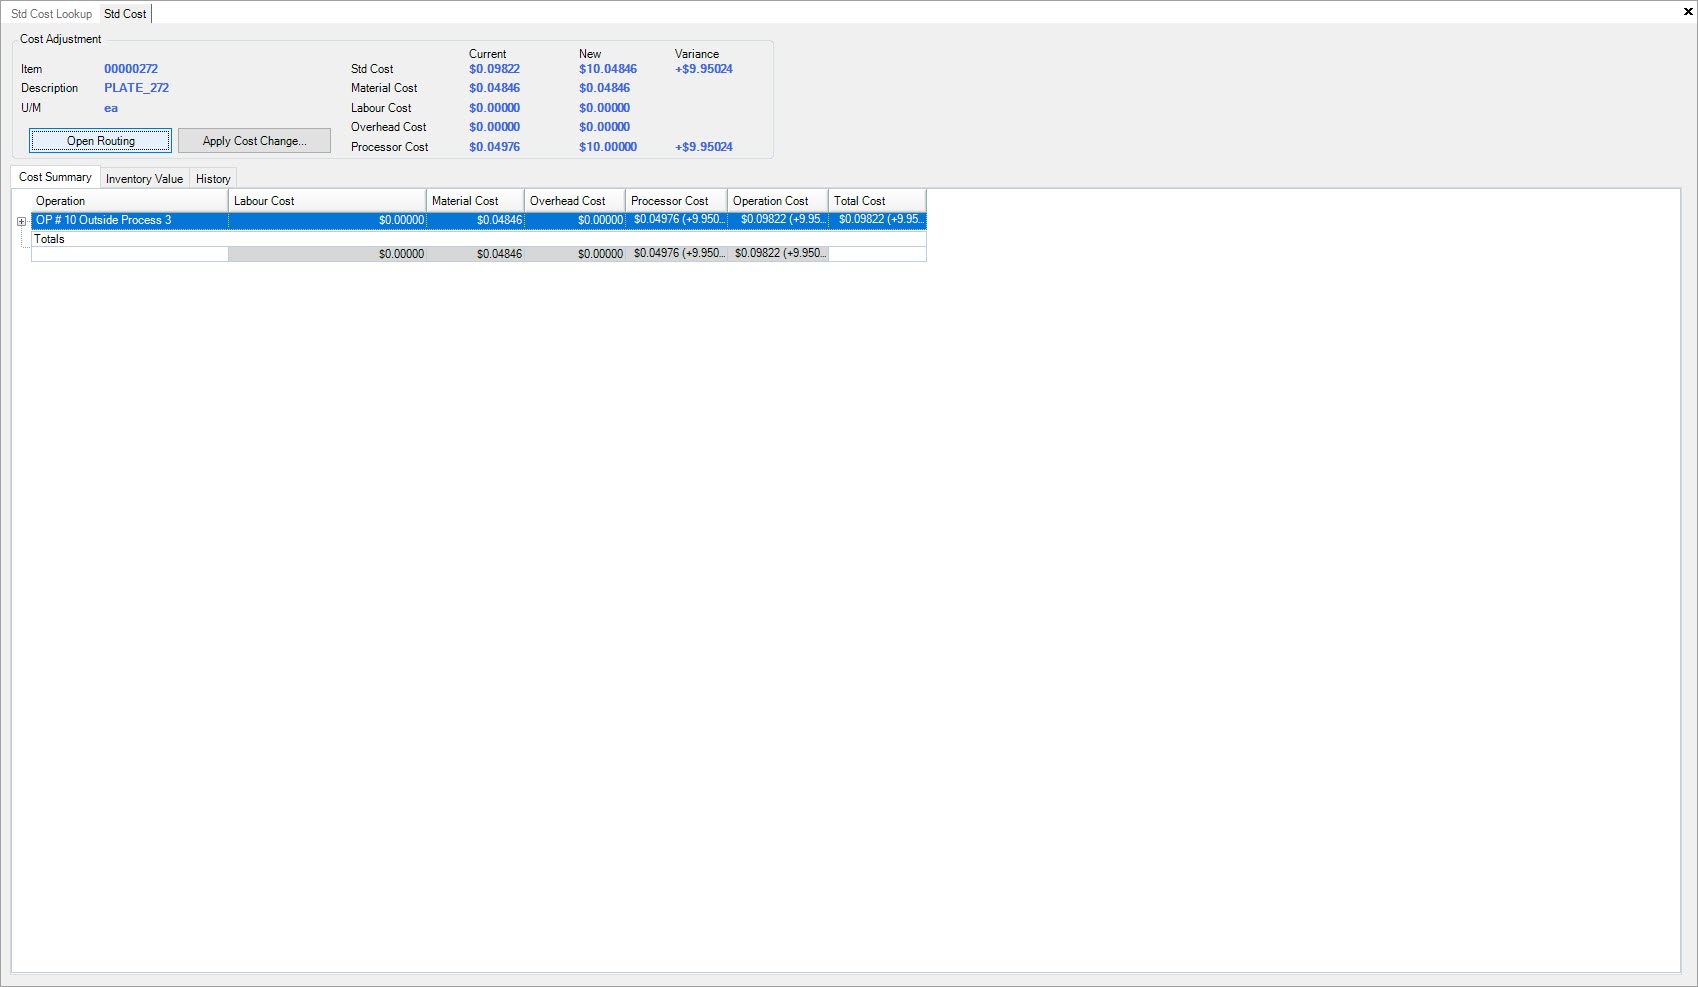
Users also have the ability to expand the Operation(s) in order to view the extent of that particular Operation and Item.
Inventory Value
To view the Inventory Value of a Manufactured Item, navigate to the  tab and click on the
 ![]() icon. The Std Cost Lookup screen will
be displayed.
icon. The Std Cost Lookup screen will
be displayed.

Make sure to select the  tab located near the top of the screen.
Locate and double-click on the appropriate Manufactured Item. On the Std Cost detail screen.
Note
Users can also right-click on the appropriate row and select the Go To Std Cost... option which will bring users to the Std Cost detail screen.
Make sure to select the  tab.
tab.
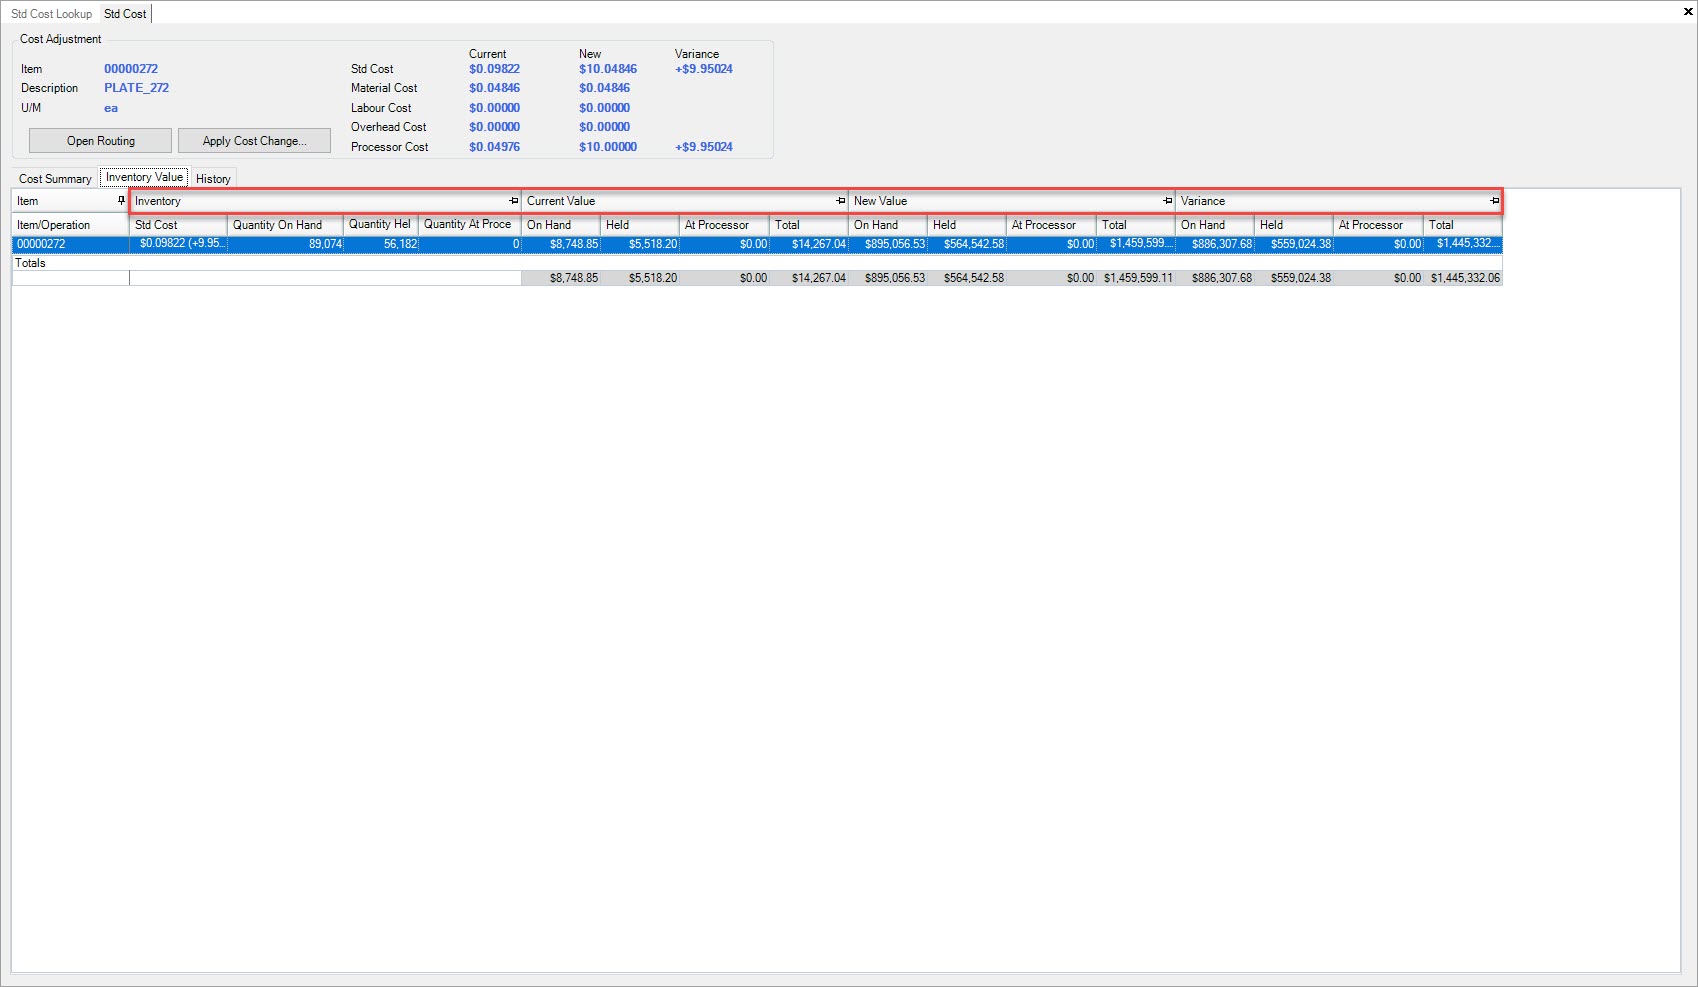
Here, users will be able to view the Inventory Value for a particular Manufactured Item broken down into different categories such as Inventory, Current Value, New Value, and Variance.
History
To view the History of a Manufactured Item, navigate to the  tab and click on the
 ![]() icon.
The Std Cost Lookup screen will be displayed.
icon.
The Std Cost Lookup screen will be displayed.

Make sure to select the  tab located near the top of the screen.
Locate and double-click on the appropriate Manufactured Item.
Note
Users can also right-click on the appropriate row and select the Go To Std Cost... option which will bring users to the Std Cost detail screen.
On the Std Cost detail screen, make sure to select the  tab.
tab.
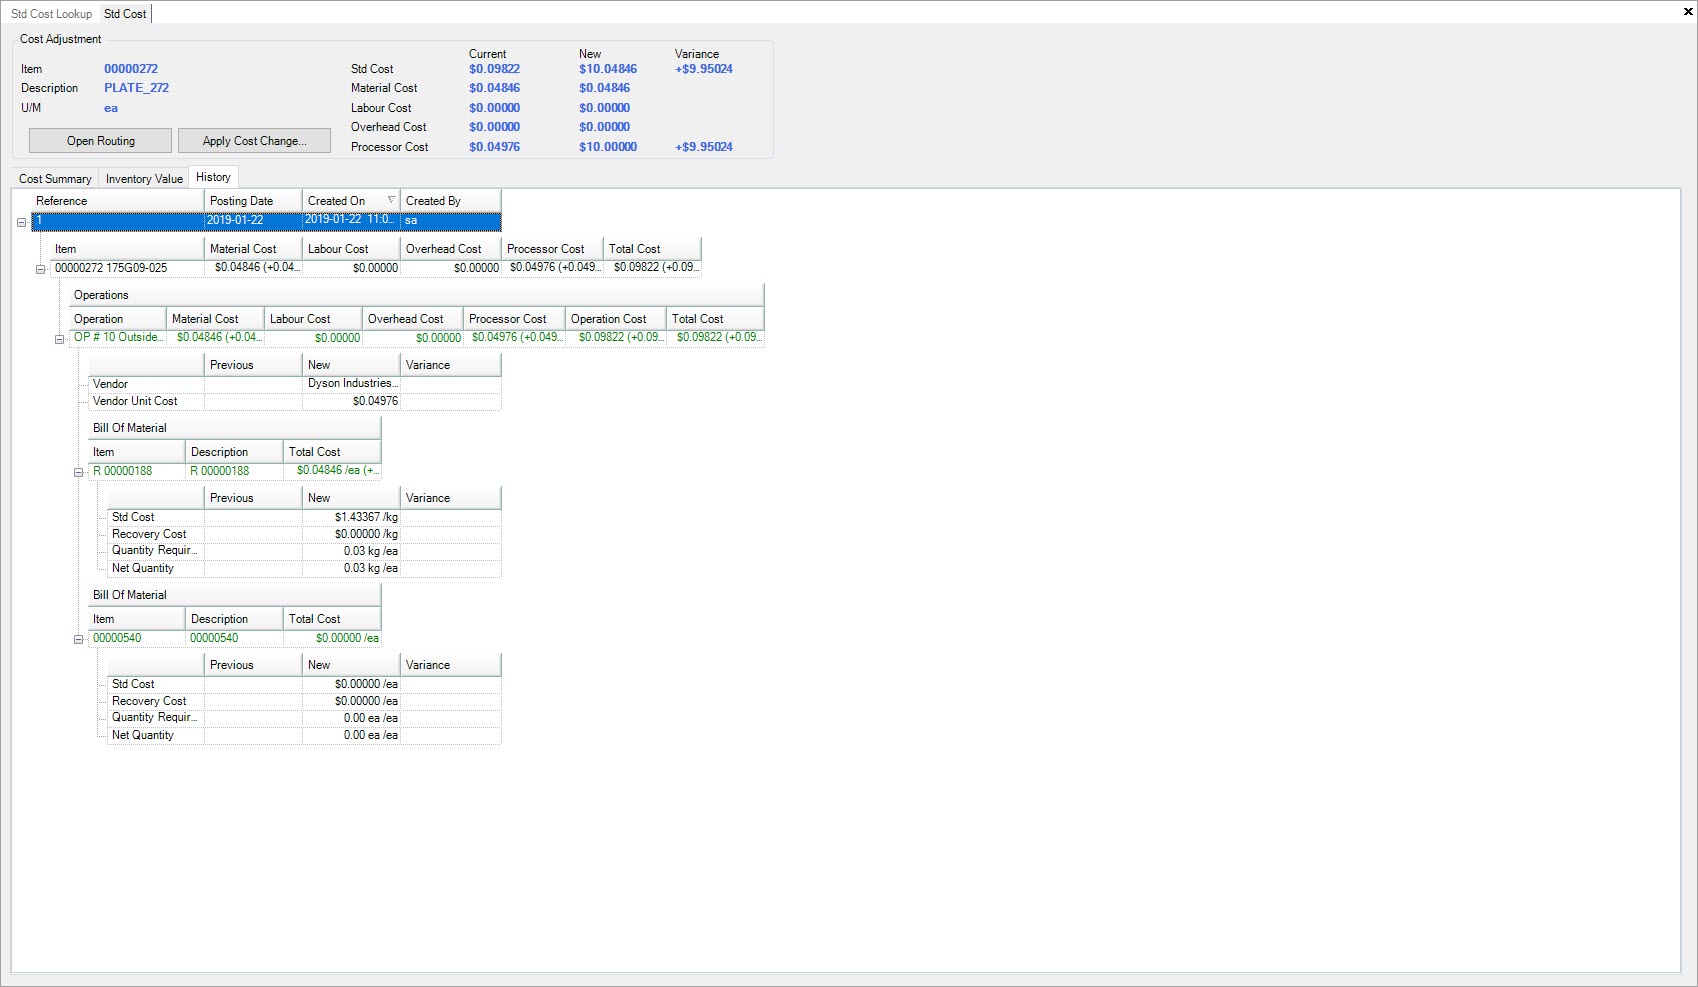
Here, users will be able to view the History of a Manufactured Item based on Reference(s) made in the system. Users are able to expand the Reference(s) in order to view the Item, Material Cost, Labour Cost, Overhead Cost, Processor Cost, and the Total Cost.
Opening a Manufacture Routing from the Std Cost Screen
To open a Manufacture Routing from the Std Cost screen, navigate to the  tab and click on the
 ![]() icon. The Std Cost Lookup screen will be displayed.
icon. The Std Cost Lookup screen will be displayed.

Make sure to select the  tab located near the top of the screen.
Locate and double-click on the appropriate Manufactured Item.
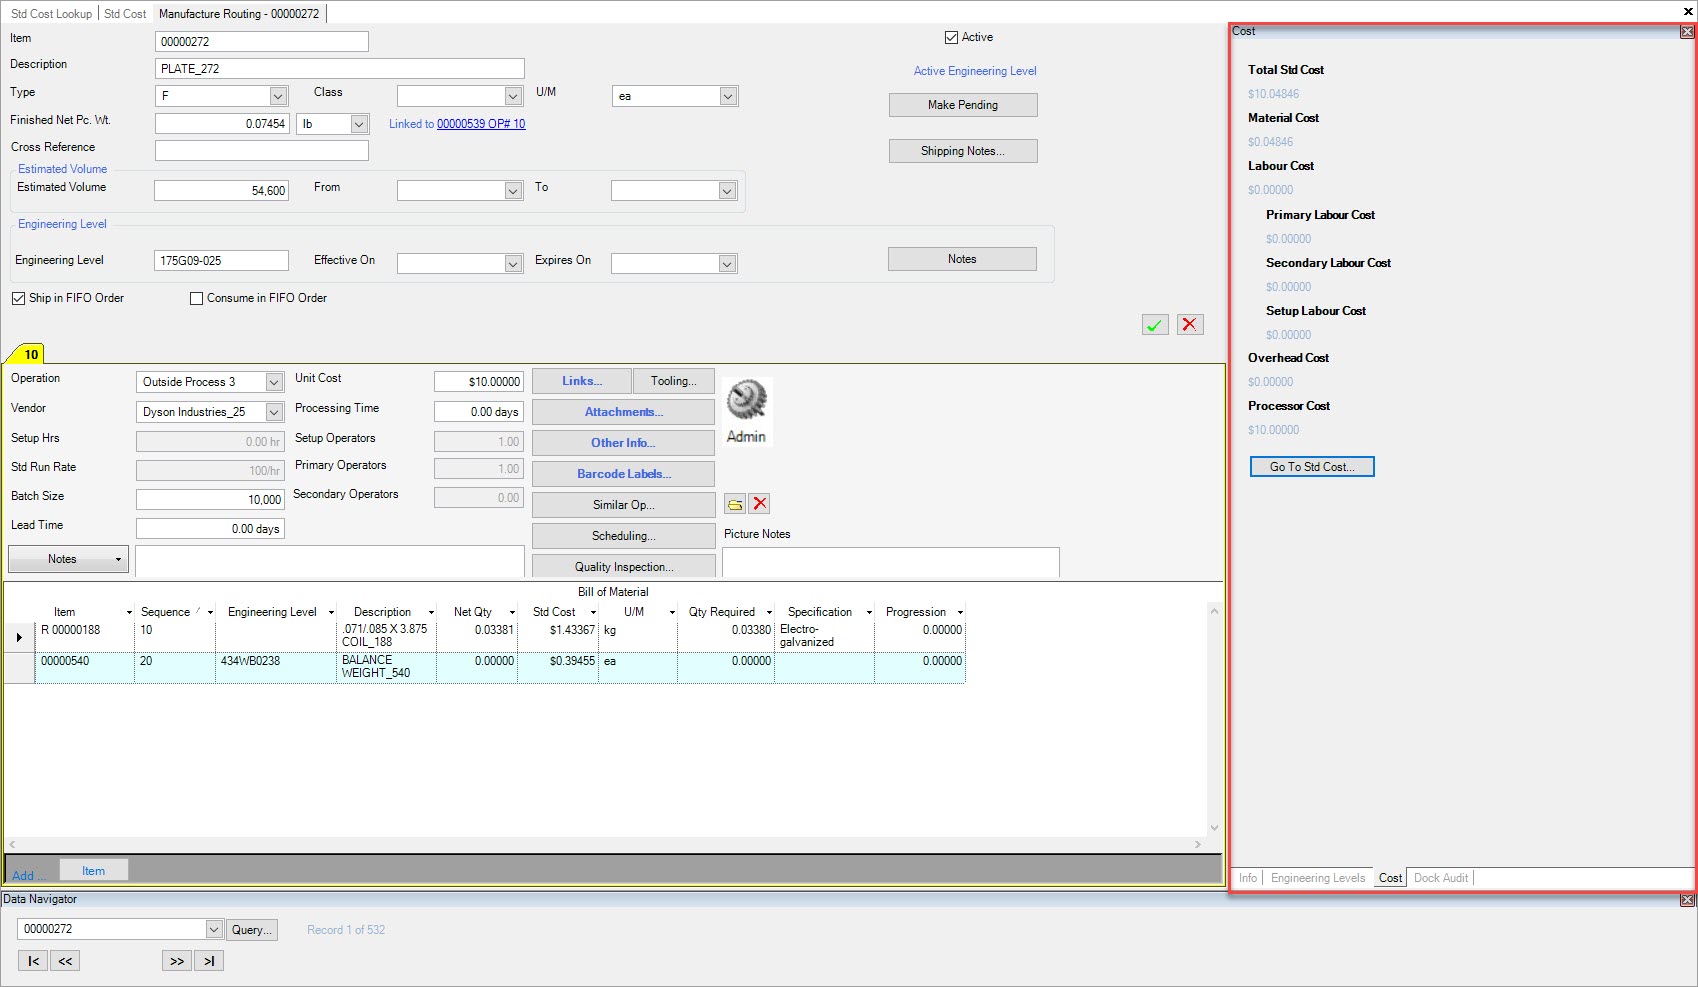
Click on the  button. The Manufacture Routing screen for that Item will be displayed.
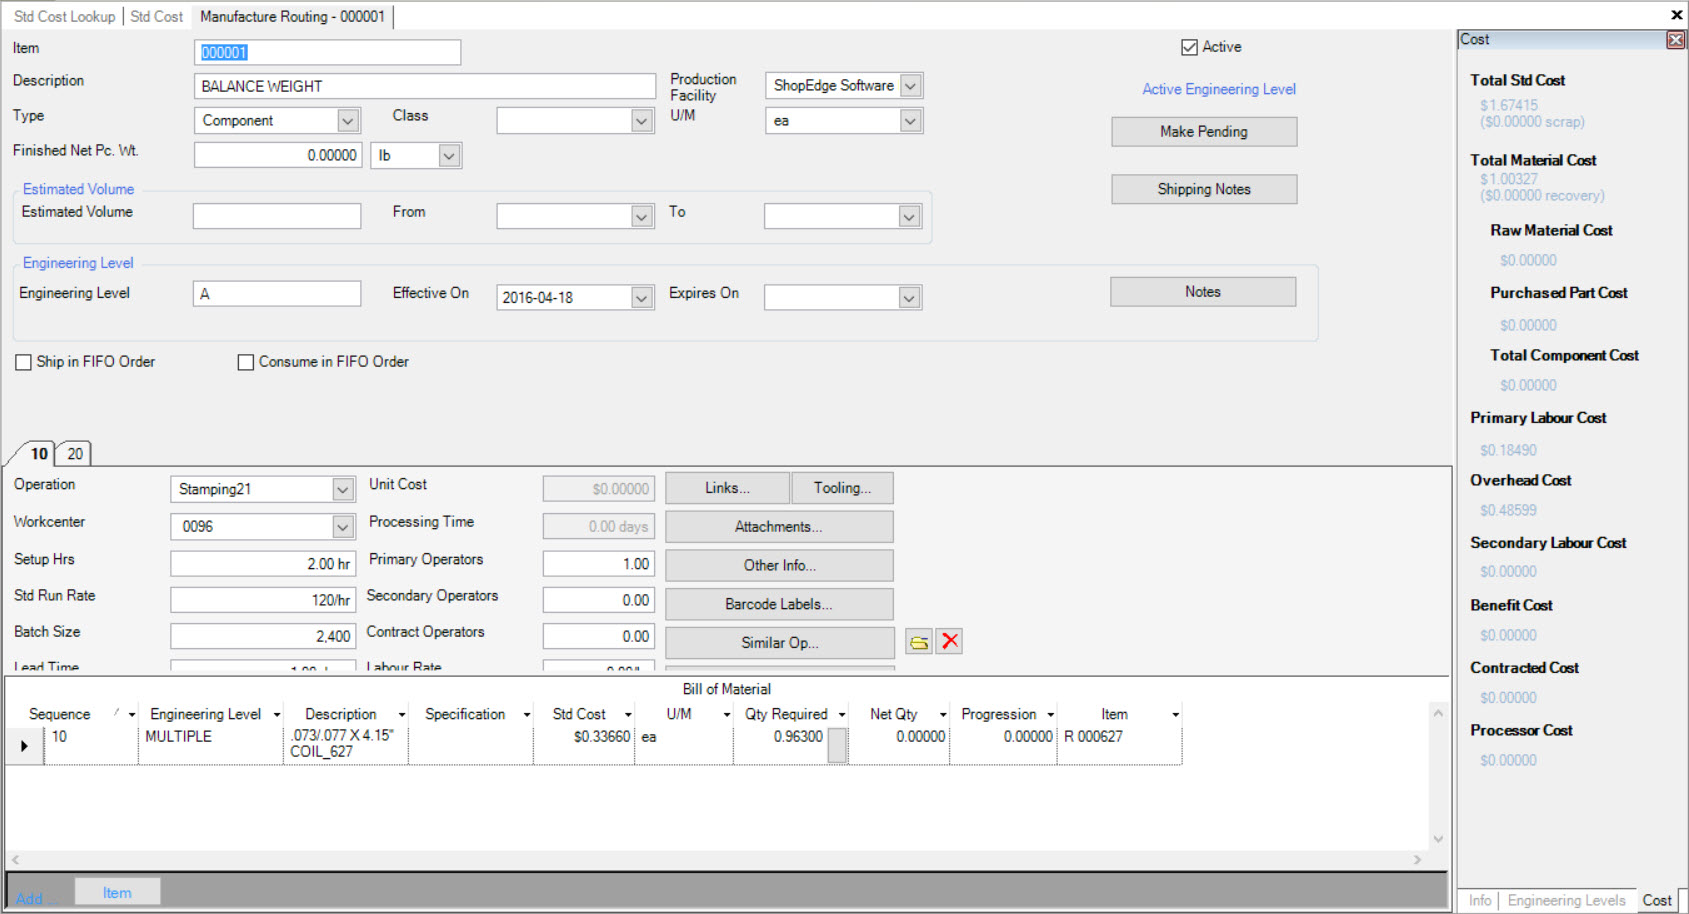
Users will be able to view a breakdown of the cost by clicking on the  tab located to the bottom-right of the screen.
Note
Users can also open the Manufacture Routing screen by right-clicking on the appropriate row and selecting the Go To Manufactured Routing... option.
Note
Users can also navigate back to the Std Cost detail screen by clicking on the  button.
Applying a Cost Change
To apply a cost change to a Manufactured Item, navigate to the  tab and click on the
 ![]() icon.
The Std Cost Lookup screen will be displayed.
icon.
The Std Cost Lookup screen will be displayed.

Make sure to select the  tab located near the top of the screen.
Locate and double-click on the appropriate Manufactured Item.
Click on the  button.
Note
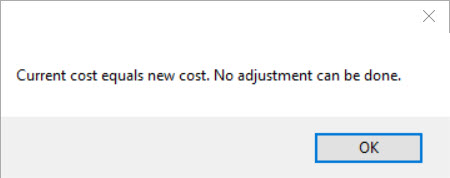
If Current Costs and New Costs match, a window will appear stating that no adjustments need to be made.
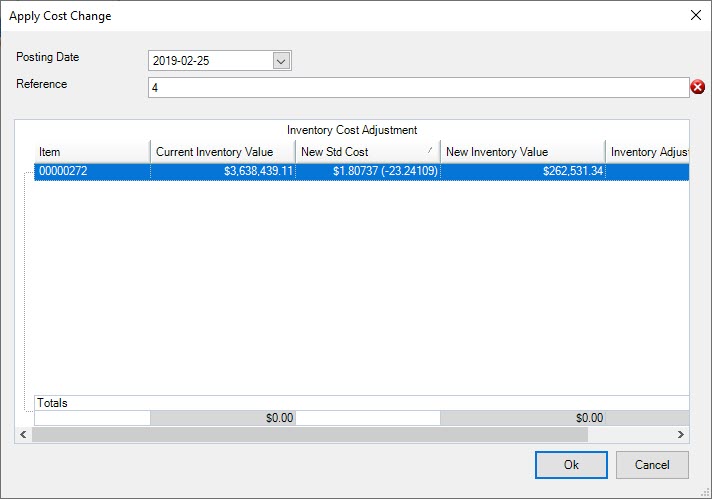
If the Current and New Costs do not match, the Apply Cost Change window will appear. Users must enter in a Reference and then, click on the  button.
Make sure to save your changes before exiting the screen.
Std Cost Purchased Items
To view Purchased Items in the Std Cost Lookup, navigate to the  tab and click on the
 ![]() icon. The Std Cost Lookup screen will be displayed.
icon. The Std Cost Lookup screen will be displayed.

Make sure to select the  tab located near the top of the screen.
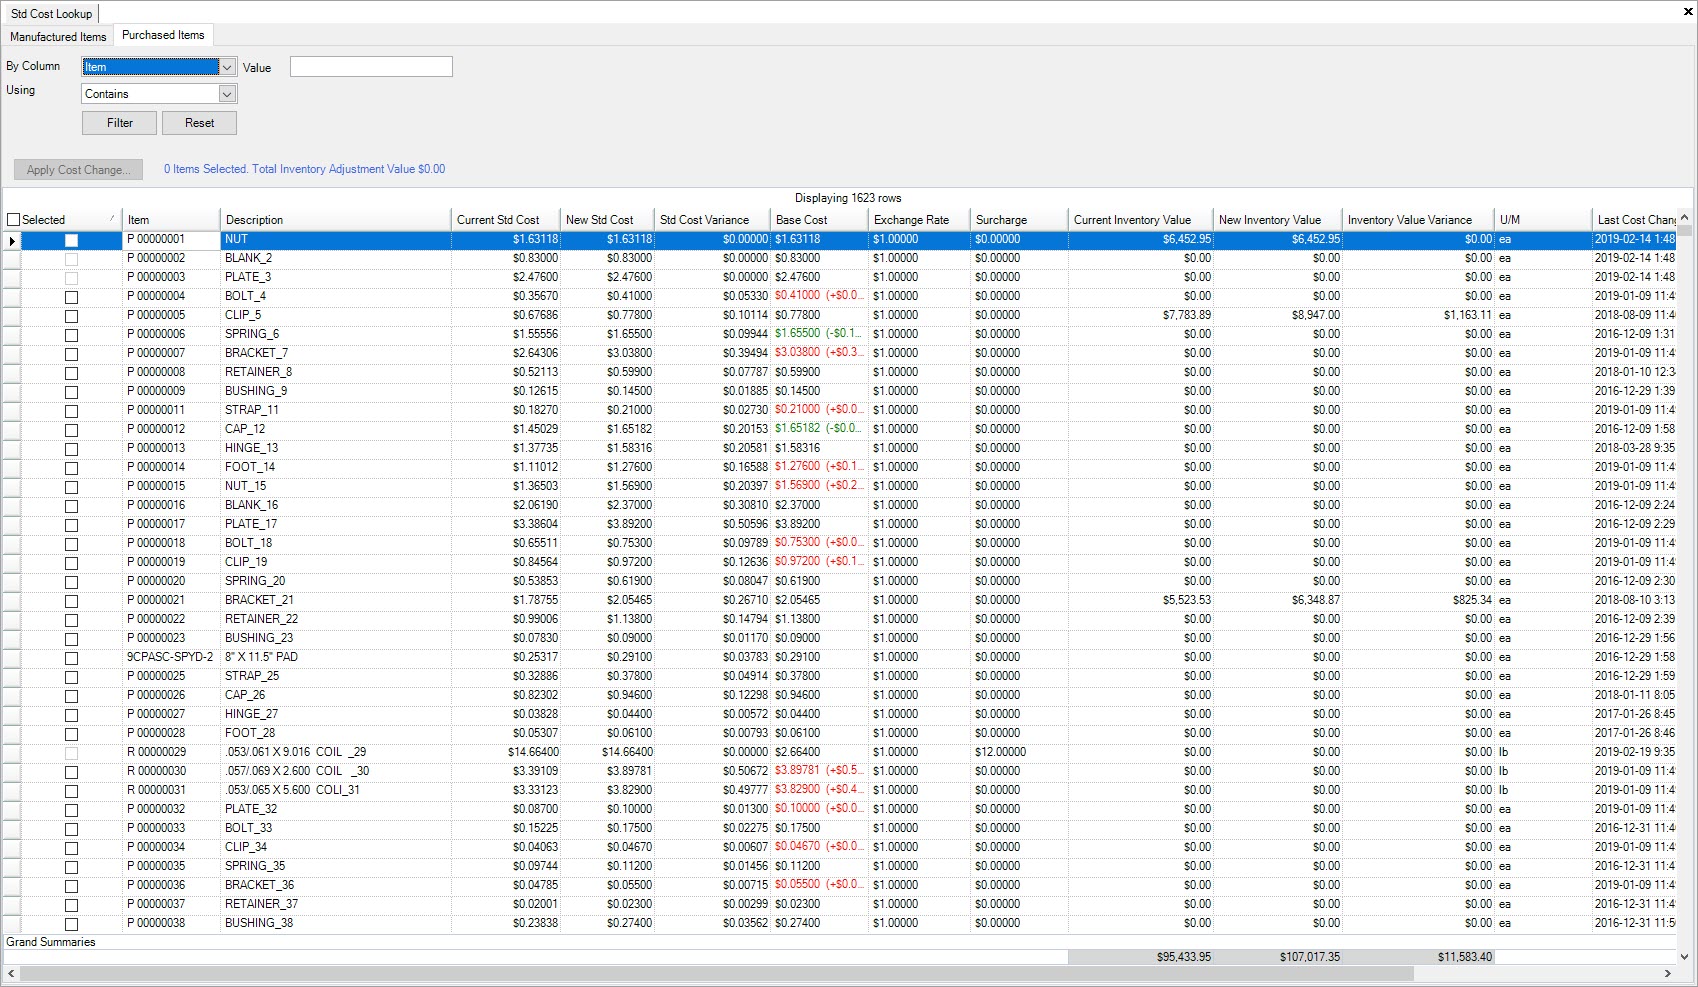
All of the Purchased Items in the system will appear whether they have a cost change or not. If a cost change is needed, the selected checkbox will be available. If a cost change is not needed, the selected checkbox will be greyed out.
Applying a Cost Change for a Purchased Item
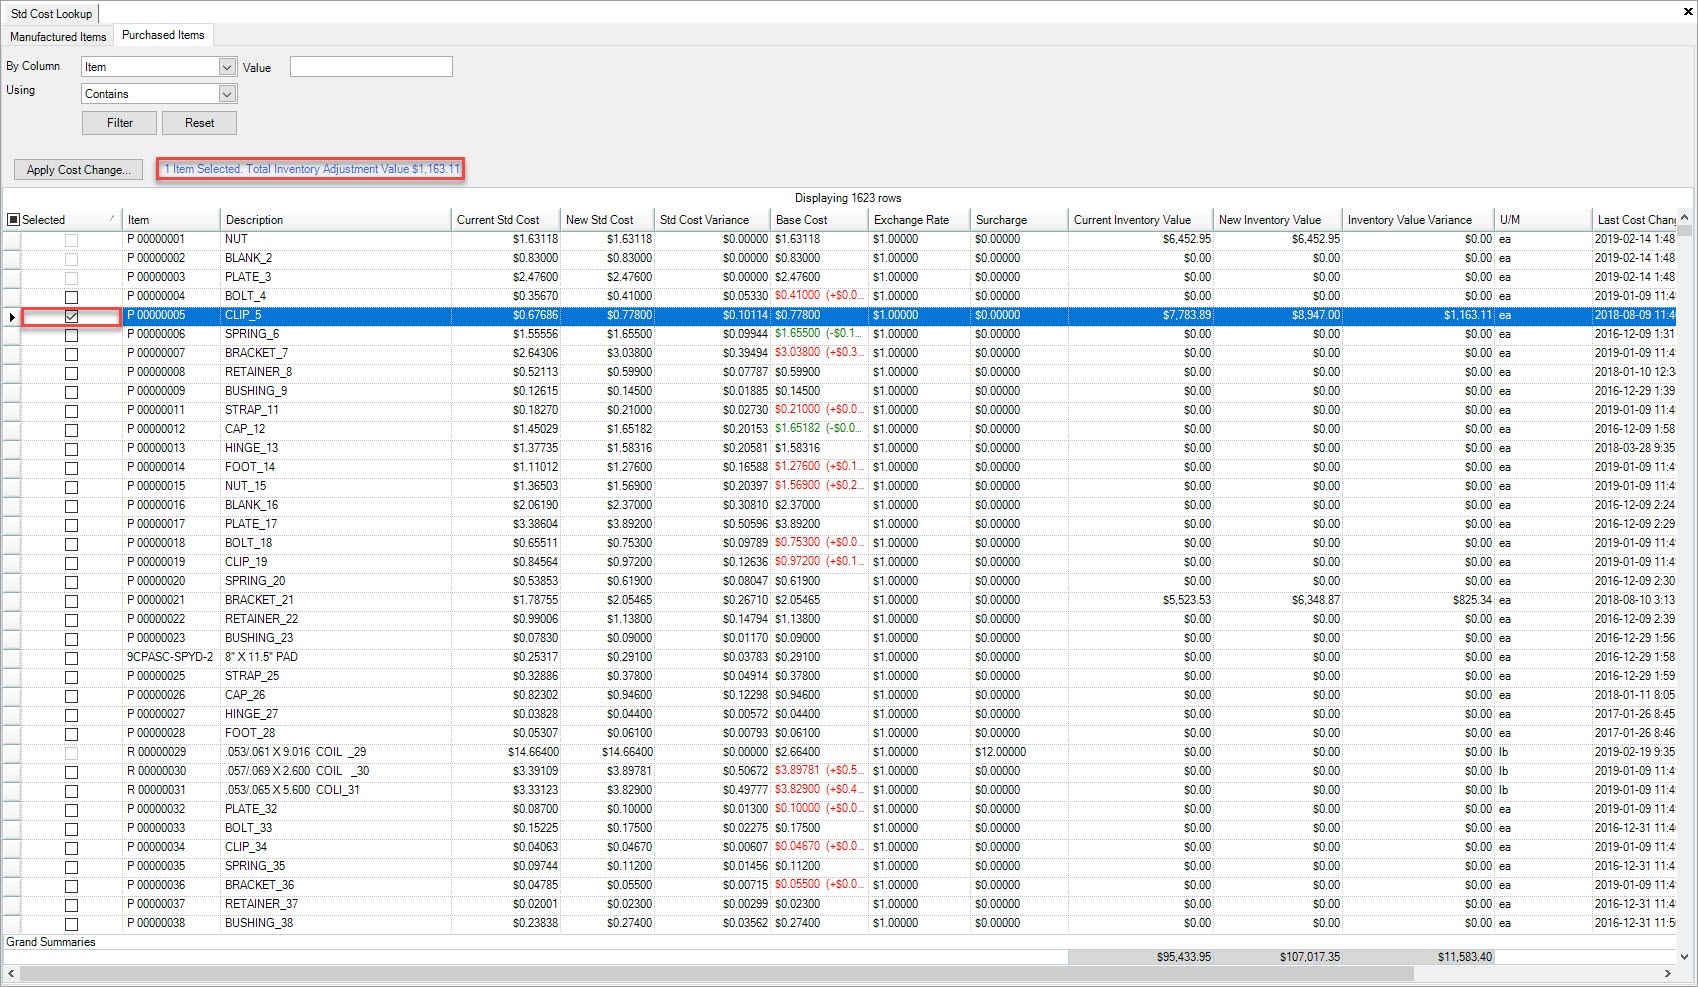
To apply a cost change to a Purchased Item from the Std Cost Lookup screen, users must select a Purchased Item where the selected checkbox is available to select. This means that there is an available cost change to be applied.
To apply a cost change, navigate to the  tab and click on the
 ![]() icon. The Std Cost Lookup screen will be displayed.
icon. The Std Cost Lookup screen will be displayed.

Make sure to select the  tab located near the top of the screen.

Locate and select the checkbox under the Selected column for the Purchased Item you wish to apply a cost change for.
Note
Users can also select and de-select Purchased Items by right-clicking on the row and selecting the appropriate options.
Once a Purchased Item has been selected, click on the  button.
The Apply Cost Change window will appear where users must enter in a Reference and click on the  button.

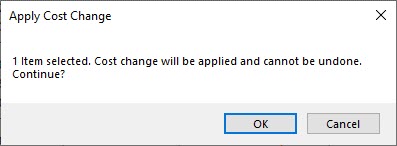
Another Apply Cost Change window will appear where users must confirm the cost change. To confirm, click on the  button.
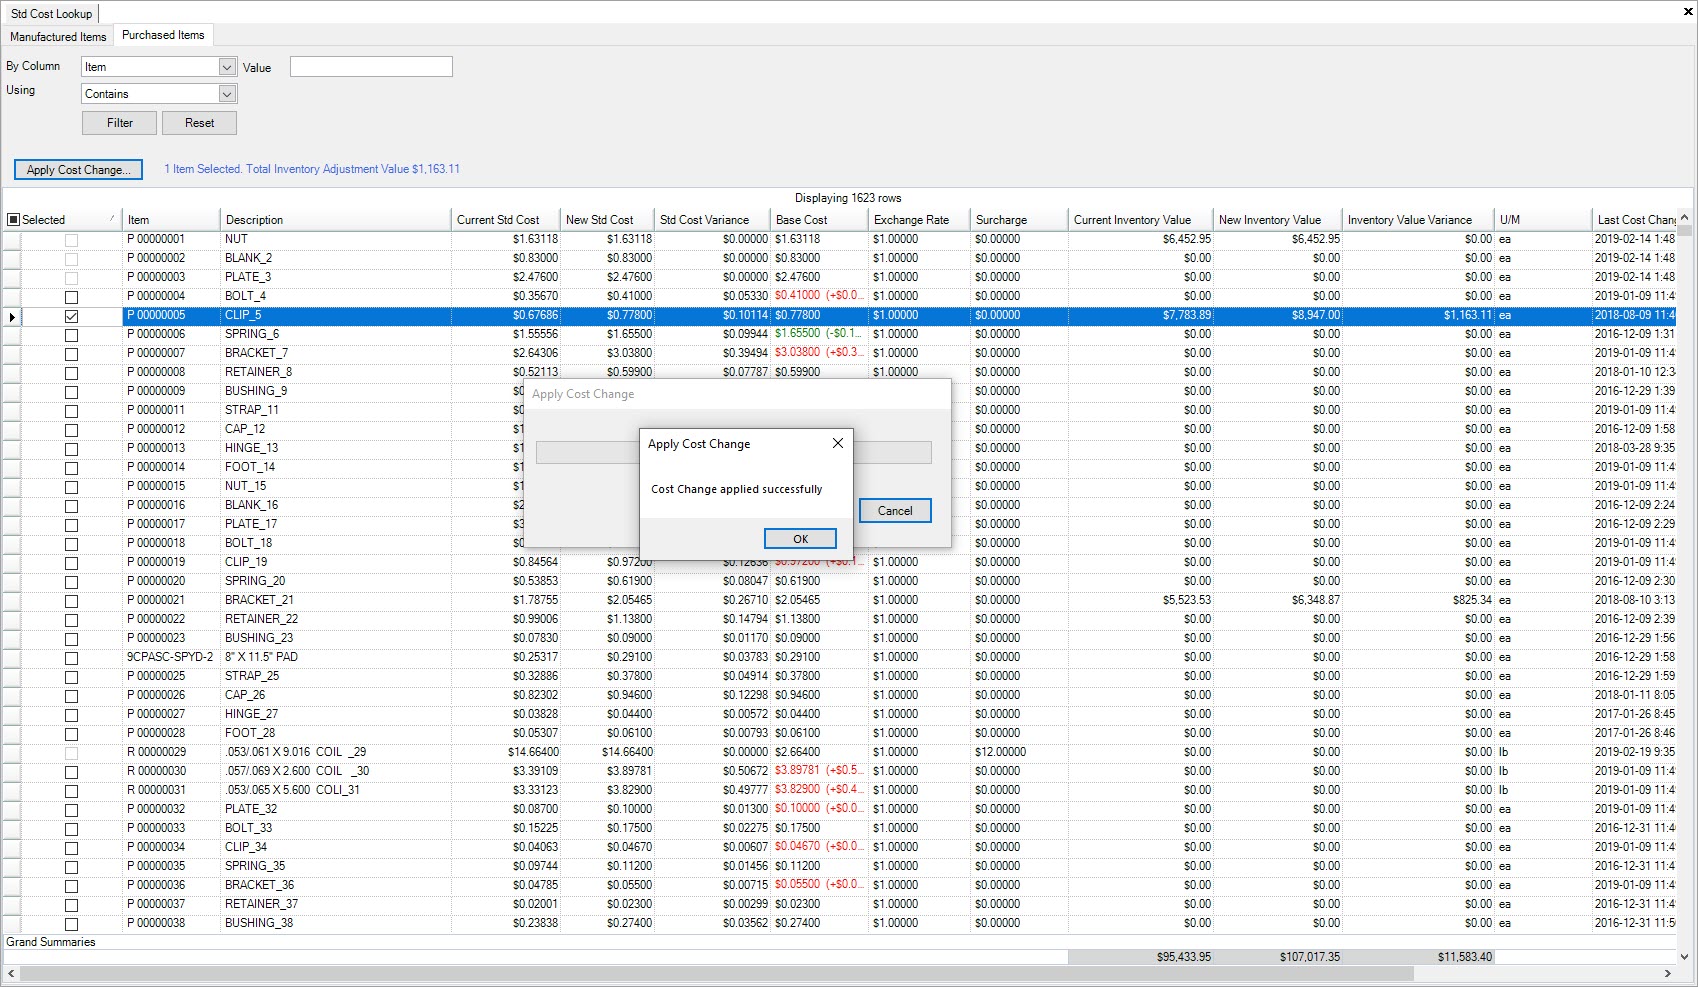
A window will appear letting users know that the select cost change was applied successfully. Click on the  button.
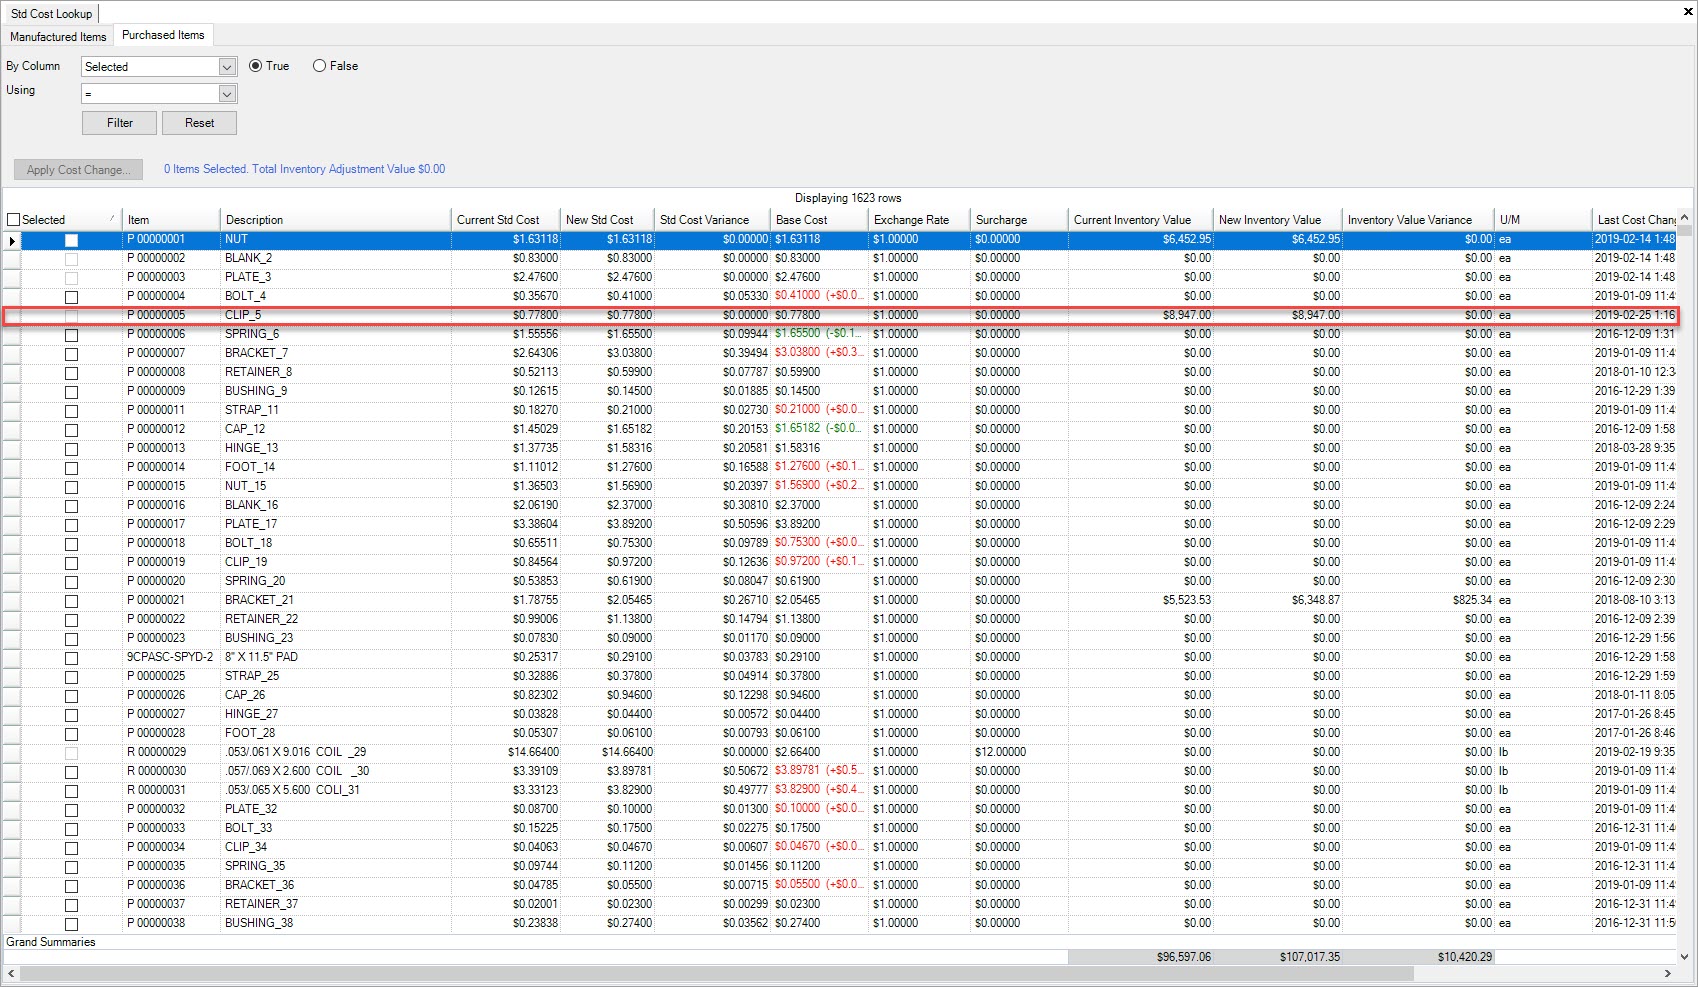
The Purchased Item will be updated.
Opening a Purchased Item from the Std Cost Lookup Screen
To open a Purchased Item from the Std Cost Lookup screen, navigate to the  tab and click on the
 ![]() icon. The Std Cost Lookup screen will be displayed.
icon. The Std Cost Lookup screen will be displayed.

Make sure to select the  tab located near the top of the screen.

Locate the Purchased Item you wish to open and right-click on the appropriate row. Select the Go To Purchased Item... option.
The Purchased Item detail screen will appear.
Note
Users can also double-click on the appropriate row to open the Purchased Item detail screen.